Discord: An Efficient Communication Tool for Pedagogical Purposes
When the lockdown began, what now seems like years ago, I, like so many other teachers, had to figure out a way to continue giving my course as seamlessly as possible. Since my literature courses were heavily reliant on student interactions and regular exchanges, my first focus was to find a flexible, efficient, and reliable communication tool. After seeing the success of the Discord server created by my colleagues in the Video Game Design program at Limoilou, I decided to experiment with the program and it proved to be exactly what I was looking for.
Why Discord?
Omnivox, while practical because of its instant notifications, was not fit for what I wanted to do; its email-like format did not encourage natural conversations, questions were asked and answered privately, and questions that would be more easily handled through a quick voice chat required an external tool.
Additionally, my in-person classes relied heavily on conversations in small groups as well as students writing on a regular basis. I wanted an app that would allow me to continue doing similar pedagogical activities.
With all of those concerns in mind, I started looking for a free app that offered the following features:
- Integrated notifications so that students would receive regular reminders to check their messages
- An all-in-one solution for communication and file sharing to limit the number of different apps my students would have to use
- A user interface that encouraged more natural conversations than MIOs or forums
- A way for students to ask questions publicly to limit the number of times I would have to answer the same question
- Voice chat functionalities that supported video chat and screen sharing
- Permanent text-chat to serve as a class forum
Discord ticked all of the boxes and had the added advantage that many students were already familiar with it. Discord is the world’s most popular communication app for gamers. Chances are, if any of your students play video games, they already use the app every day.
Turning a tool for gamers into a tool for teachers
Like most communication tools, Discord offers basic chat and voice or video call functionalities. This makes it easy to send a student a quick text reminder before switching to video call for a one-on-one interview, or to switch to voice call if you are asked a question that would be better answered orally.
However, what differentiates Discord from other communication tools is that it allows you to create private servers you can customize to act as a virtual classroom where you can share content and hold meetings.
Servers offer 2 types of channels: voice channels and text channels.
Voice Channels
Voice channels are virtual rooms where users can either voice chat or video chat, and can also share their screens. Since Discord is optimized for streaming, those channels are a solid option for PowerPoint based lectures.
I use one such channel as a virtual “office” when students are working on assignments or projects during my class hours. Students can drop in, get the clarification or feedback they need and then disconnect.
Also, the ability to limit the number of users in specific voice channels makes them ideal for workshops or working on projects in small groups. For example, you can set a 5-person limit per channel, split your class in groups of 4, and “move around the class” by joining each channel to listen to the students’ interactions and provide feedback as needed.
Text Channels
Text channels are chat rooms where you can upload documents and pin important messages, which is great to divide and share course content.
In my case, I decided to create one dedicated text channel for each assignment, one text channel for each week of content, as well as a dedicated channel for informal conversation where my students could share memes.
For each assignment channel, I pinned to the channel the instructions as well as any relevant documentation and then students could ask questions or request clarifications. Those channels saved me a lot of work; instead of replying to 3 different MIOs asking the same question before deciding to send a MIO to the whole class, the question is asked and answered publicly, significantly reducing the number of times I have to repeat the same information.
For the class content channel, I pinned a message with the texts to read for a specific week, as well as a list of questions which the students could then discuss with the rest of the class. Those channels played the role of class forums.
The informal discussion channel, which I first devised as a way to let students interact with each other in a more relaxed way, also proved quite useful, pedagogically speaking. Often, a day or two before an important deadline, some students would start posting memes about procrastination. I would then check in on those students to figure out what was keeping them from beginning their assignment and address any questions or anxieties they might have had.

Example of a meme posted on the dedicated informal discussion channel that prompted a quick check-in via private message.
If the pedagogical potential of Discord has piqued your interest and you would like to try your hand at setting up your own server, read on for a full guide on how to get your own Discord server up and running in 6 easy steps!
Setting up your Discord Server
1. Download the app
While, technically, the in-browser version of Discord allows you to do all of the same things as the app, downloading the app offers many advantages. Notably, you can receive new-message or mention notifications while the app is hidden in your taskbar. At the very least, you should install the app on your main computer and ask your students to do the same. To create an account, choose a username and enter a valid email address. For class management purposes, I requested that my students use their real name as their usernames. Also, the email address will only be used for account recovery purposes, none of your personal information will ever be shared with the app.
2. Create your own server
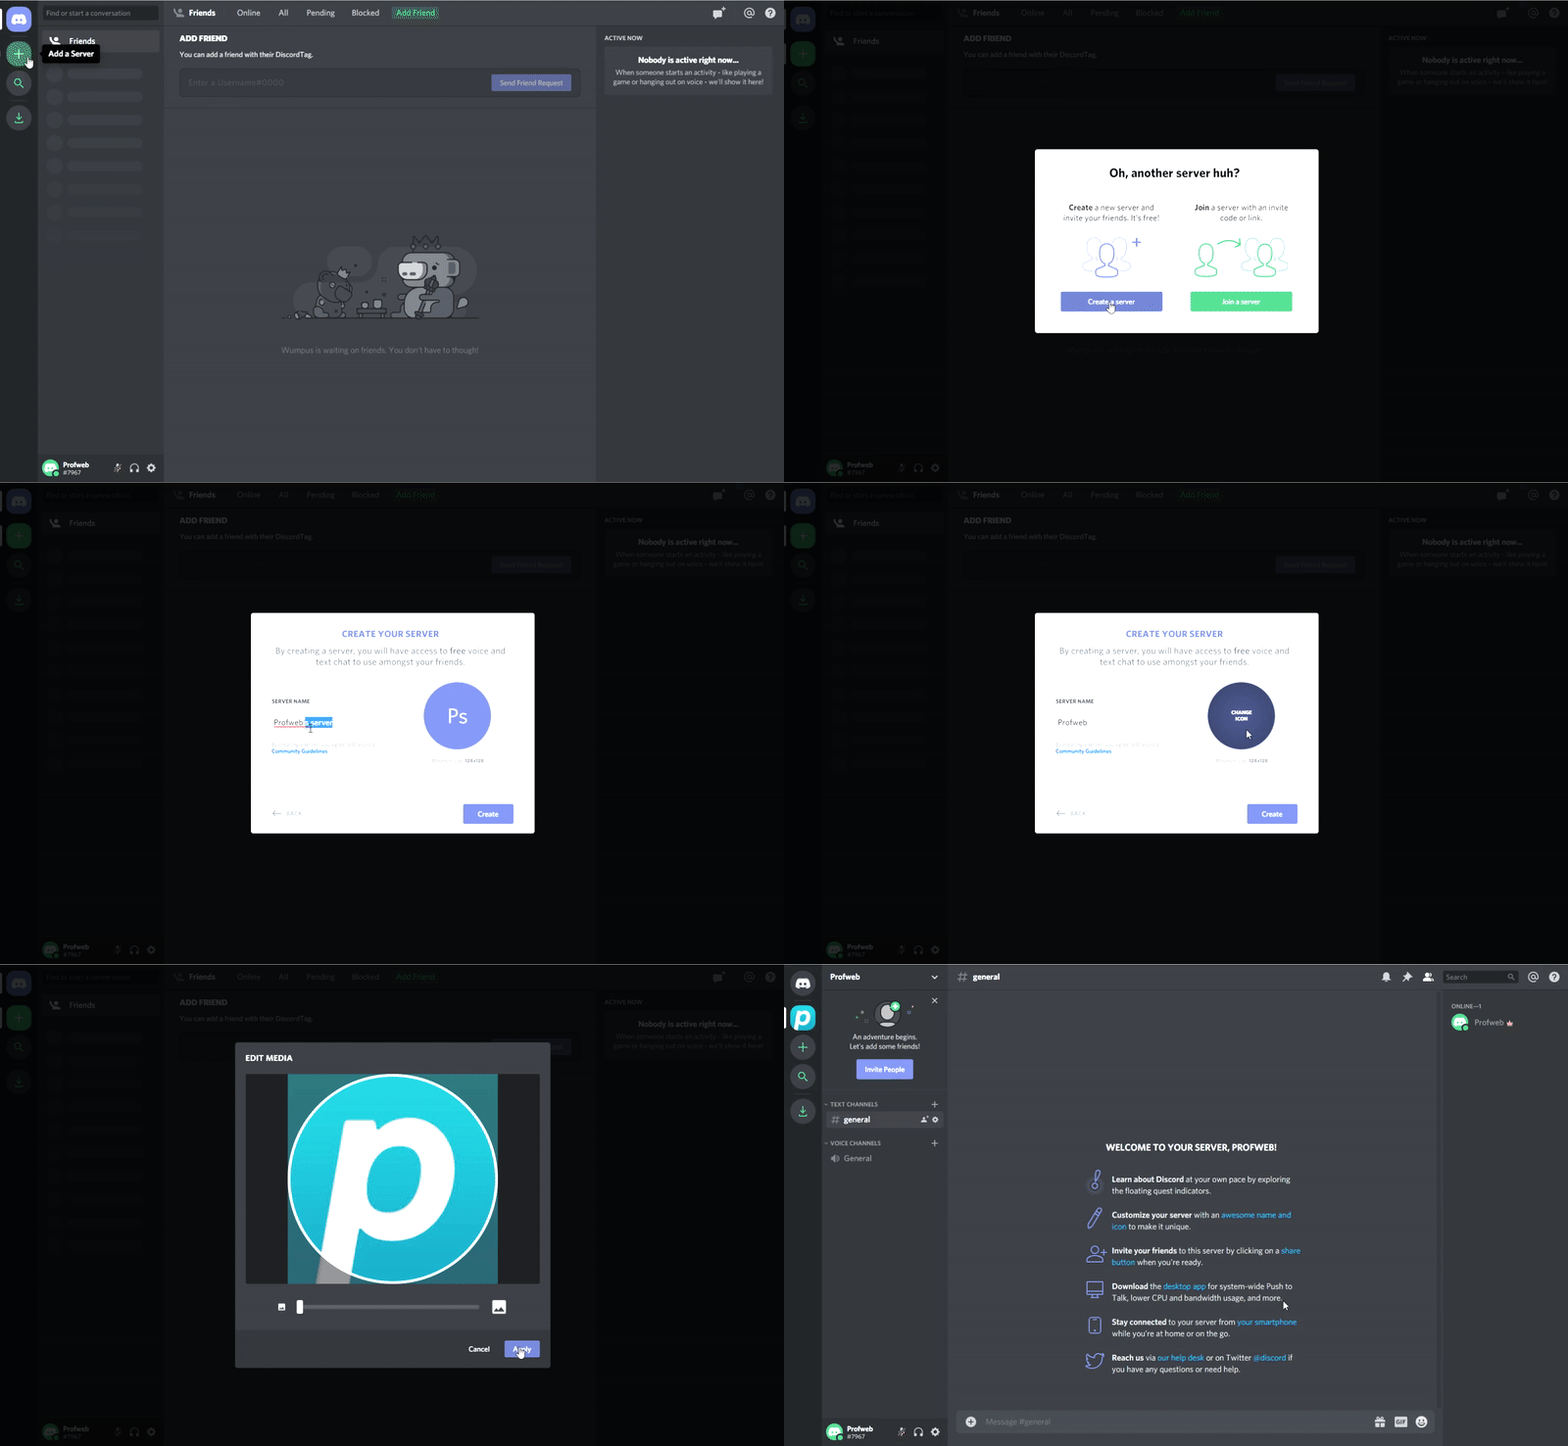
In the app, you can create a new server by pressing the large plus sign on the left side. You will then be invited to choose a name and icon for your server. Customize it to your liking and then click on “Create Server” to complete the process.
3. Customize your server by creating channels
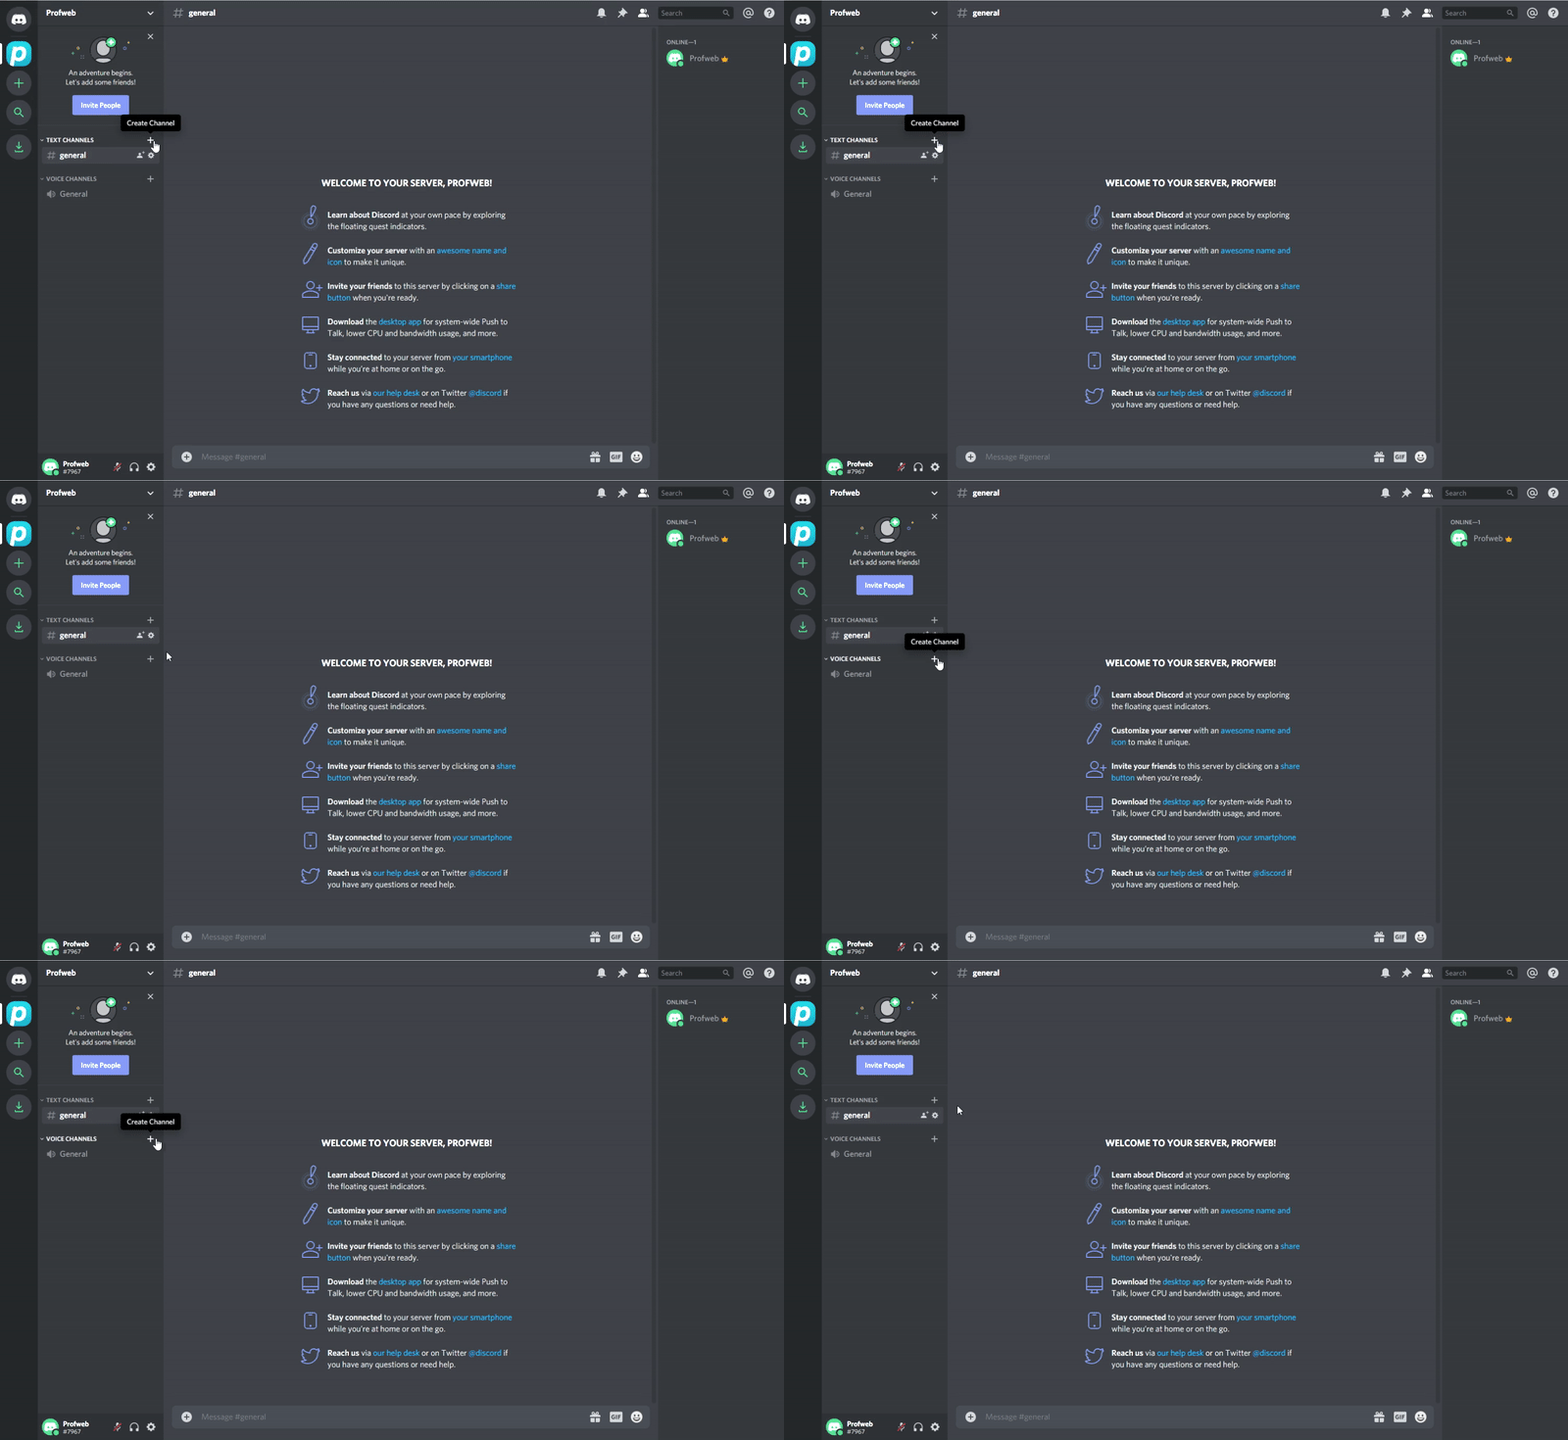
Your new server will start with 2 “general” channels: one text channel and one voice channel. Those channels can be renamed by clicking on the small gear icon that appears next to their name when you hover them with your mouse. You can create new channels by clicking on the small plus sign next to the channel category.

Creating additional text channels allows you to divide your conversations by week or by theme, for example. Additional voice channels can be used as breakout rooms for activities in small groups.
4. Create roles for your server

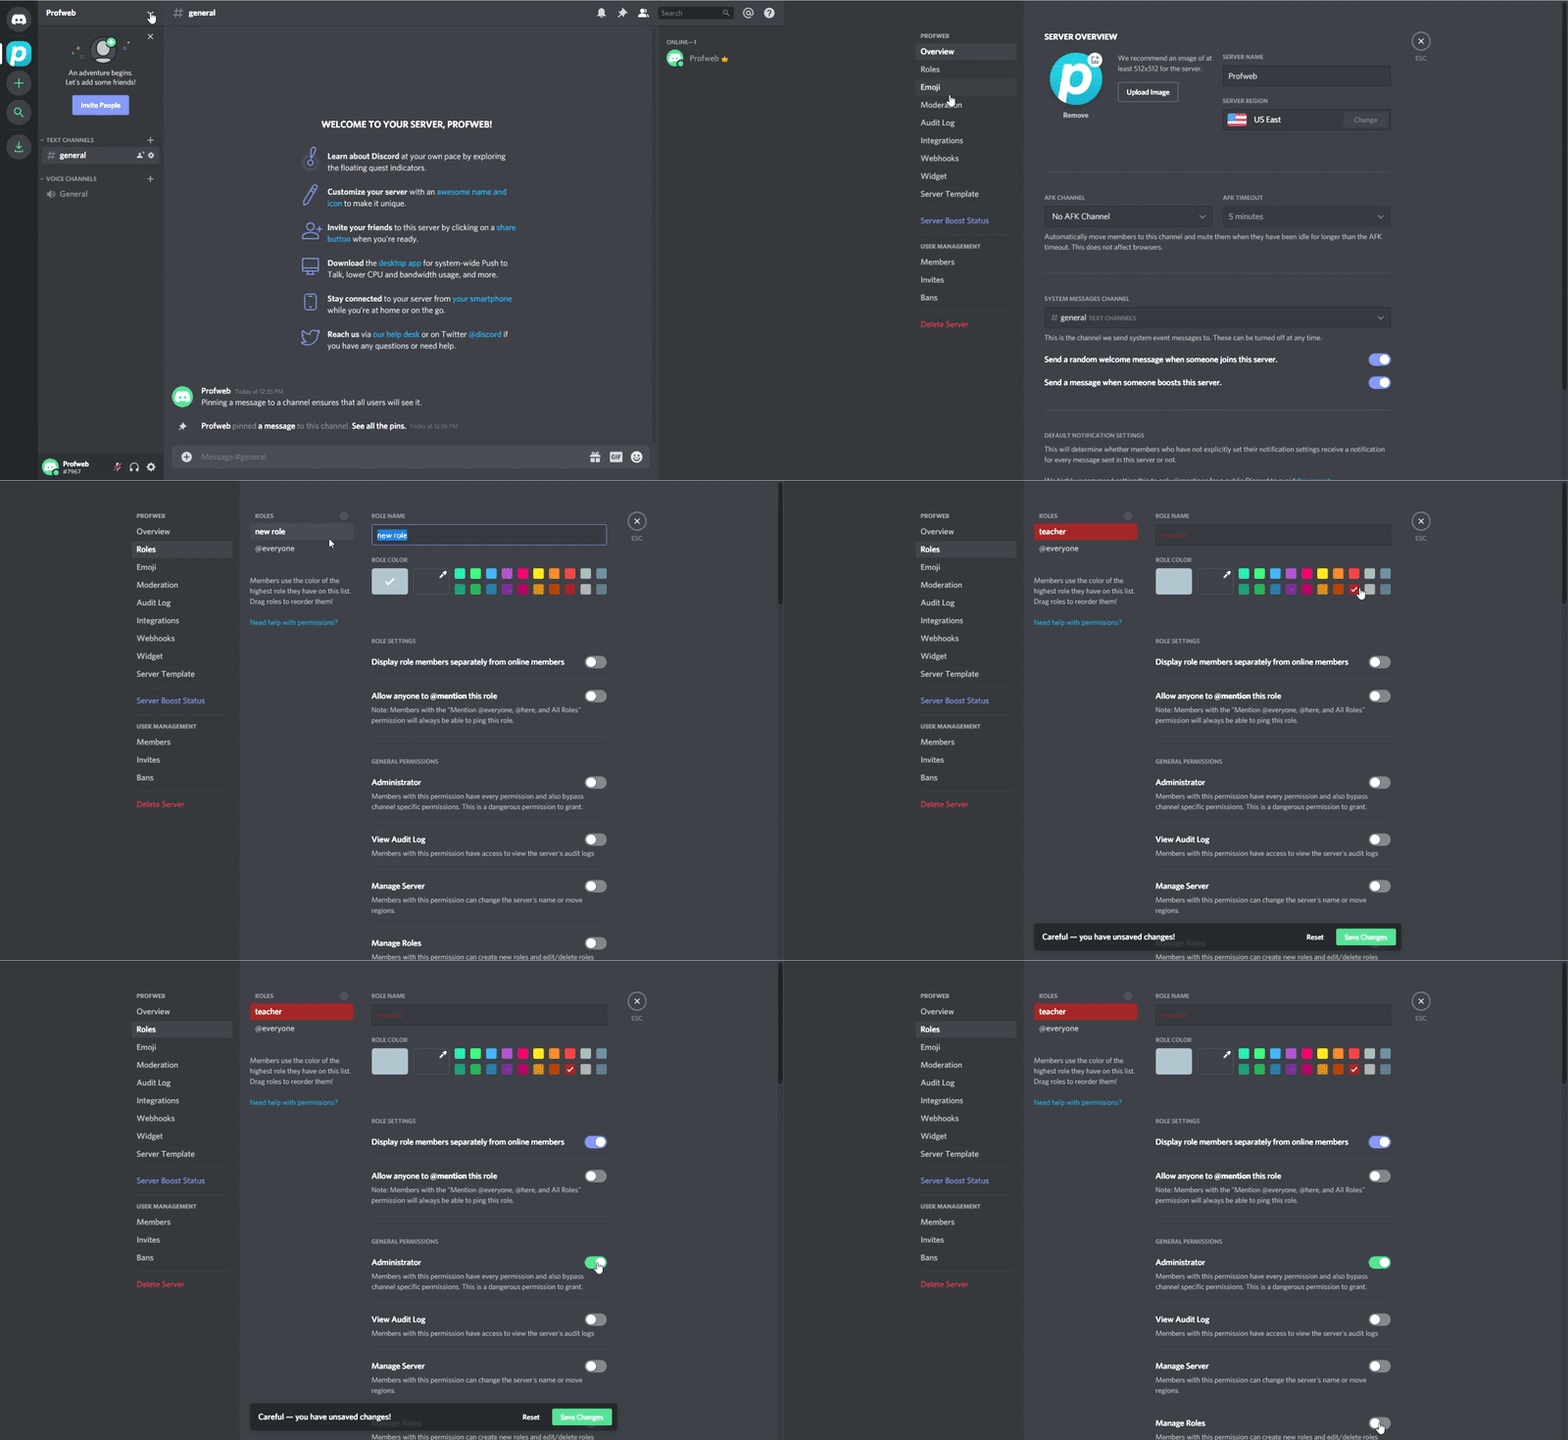
Clicking on the name of your channel in the top left corner lets you access “Server Settings” and personalize roles.
The “Roles” subsection of the settings can be found by clicking on the name of your server in the top left corner, clicking on “Server Settings”, and then clicking on “Roles”. By default, there will only be one role, “@everyone”.
Roles are important because they allow users to mention a group rather than a person, which will send a notification to all users in that group. Roles also dictate what permissions each user on the channel has; the more time you spend customizing the permissions you will give to your students, the less moderation you will have to do afterward.
To keep things simple, I suggest creating 2 roles: “Teacher” and “Student”.
For “Teacher”, make sure to enable “Display role members separately from online members” so that you always appear at the top of the user list for your students. Also, enable “Administrator” in “General Permissions”, that way, you will not have to enable every permission manually.
For “Student”, the fewer permissions you enable, the less moderation you will have to do on your servers. You can customize this to your liking, but, in my opinion, disabling every permission in “General Permissions” with the exception of “Read Text Channels & See Voice Channels” is probably the way to go. In “Text Permissions”, make sure to disable “Manage Messages” so that your students cannot edit or delete each other’s messages.
5. Invite your students
To invite your students to your channel, click on the blue “Invite People” button in the top left corner of your server. At the bottom of the pop-up will be an invitation link. By default, this invitation link is only valid for 24 hours. Therefore, if you expect your students to take a bit of time to read their emails or MIO, you can click on “Edit invite link” to customize your server invite and remove the time limit.
6. Assign roles
As users join your server, you will need to give them a role to limit their permissions. Give yourself the role of “Teacher” and then give all of your students the role of “Student”. To do so, right click on the name of the user and go to “Role” at the very bottom of the menu.
And there you have it! Keep in mind that this is a barebone server and that Discord is the kind of app that heavily rewards spending some time exploring it and tweaking around with the settings.
Have you experimented with Discord for pedagogical purposes? What was your experience? If you have your own success story with Discord, share it in the comments below!
Acknowledgements
Thanks to Pierre-Alexandre Leclerc and Mathieu Hunter, my colleagues in the Video Game Design program at Cégep Limoilou for their collaboration in the writing of this article.


