Sharing Content Efficiently with Mind Maps
If you teach in the Québec college system, chances are that you work with Omnivox. While MIO and LÉA are excellent for communicating with students quickly and easily, they are sub-optimal when it comes to sharing large quantities material. Luckily for teachers, there are ways to work around Omnivox’ cumbersome system, for instance, with the use of mind maps. Mindmeister, a web-based mind mapping application, provides a user-friendly interface to create efficient and aesthetically pleasing mind maps to share an infinite quantity of pedagogical resources from one link.
One map, one link, infinite content
In classes where there is a lot of homework and review involved, it is not rare for a teacher to need to share upwards of 50 links. Depending on the student’s cellphone setting, this could mean 50 individual notifications, enough for any sane person to want to hurl their device at the closest wall. Afterward, there remains the issue of scrolling through pages and pages of identical looking links for the student to find the one they are looking for.
Using a mind map to share your material addresses those issues by:
- Agglomerating all of your different links and resources under one web address
- Allowing you to group your links in easily identifiable and navigable subsections.
The web-based application Mindmeister provides an intuitive interface to create elaborate mind maps. The free version allows you to save 3 different maps limited to text and links only while the premium version removes the three-map limit and allows you to embed pictures and videos in your maps. For the purpose of organising and sharing review material efficiently, the free version is more than sufficient.
Creating your first map
After signing up on Mindmeister with your Google or Facebook account, you can begin the creation of your first map. When you create a new map, you will be presented with a central blue bubble around which you can add related ideas by double clicking. When you have your main sections, you can create subsections by selecting the section you want to divide and then hitting the “Tab” key.
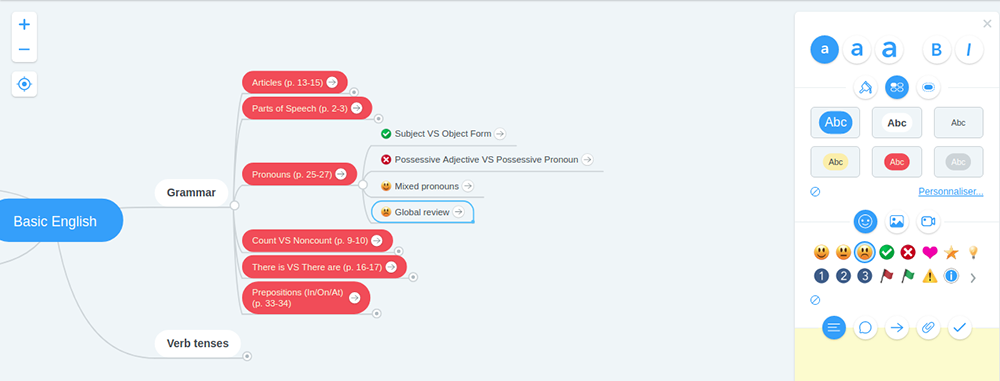
Example of a basic map for sharing content. Clicking on the small circles besides the titles will unfold the relevant subsections.
When you have subdivided the content to your liking, you can attach a written note or a link to your bubbles by using the menu on the right. For example, for my Basic English class, I divided my map by elements of content (the page numbers in parentheses indicate the pages where that content is presented in the students’ textbooks). Another possibility could be to divide the content chronologically with a subsection for every week.
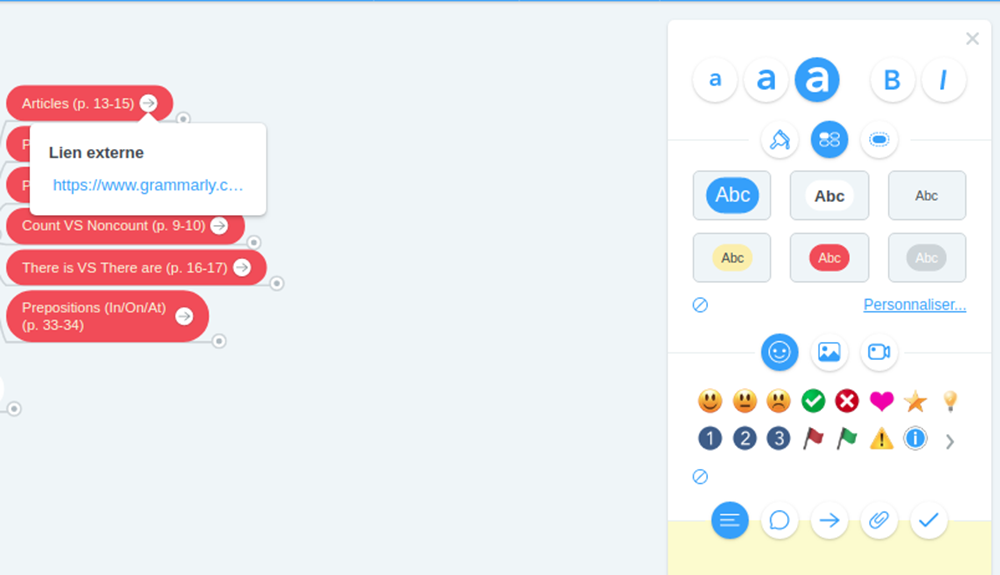
Add curated links in your map by clicking on the arrow button at the bottom of the right-hand menu. Add notes with the first button on the left.
Once you are happy with your map, share it with your students using the “Share” button at the bottom of your screen. Before you share, double check that you are linking to the “View only” version of your map or else you might gain numerous unexpected editors!
Custom maps and self-assessment for your students
It is also possible for your students to track their progress. After signing up with their Google or Facebook account, they can make a copy of your map that they can edit. This can be done by clicking on the “My Maps” arrow in the top left corner of the interface, right clicking on the shared map and pressing on “Duplicate”.

Students can copy your map by clicking on “My Maps” on the left-hand menu, right clicking on your map and selecting “Duplicate.”
The student will be able to modify the content and track their progression using the tools provided by the website. For example, if a student had some issues with a verb tense, they will be able to add a frowny face or a red “x” beside the exercise or category. Similarly, if your student masters a certain concept, they can reward themself with a smiley face or a green checkmark. It certainly beats keeping track of blue and purple links as well as navigation cookies on LÉA!
Some of the options available for your students to track their progress. Another option would be to add a note with their result on the exercise.
This new personalised map allows the student to better see what content they need to review. It can also be shared back with the teacher so that weaknesses can be identified and additional resources provided.
Have you tried using Mindmeister or any other mind-mapping tools to share content before? Do you know of other alternatives to LÉA for sharing large quantities of content? Feel free to share your experience in the comment section below.
