Digital Resources to Provide Feedback to your Students
When you are providing feedback to your students, certain technologies can be precious allies! What follows is an overview of a selection from the numerous options available to teachers.
Written Feedback and Annotations
When you are marking a paper copy of a student’s work, you manually annotate and add written comments. It’s possible to do the same thing on screen if your students send an electronic version of their work (by Moodle, or using LÉA’s Assignments module, for example).
Digital marking offers several advantages:
- You can avoid the inconvenience of handling printed copies.
- The student’s work is available from anywhere, at any time.
- It’s possible to build a pre-fabricated list of comments that you can simply cut and paste into your student’s copy, which is useful in situations where you repeat your ideas regularly. This will help you save some time.
If students send a PDF version of their work, it can be annotated using one of the Acrobat tools from Adobe, such as the freely available Acrobat Reader DC.
- To add comments to a PDF file in Adobe Acrobat Reader DC, display the Comments toolbar by clicking “Comments” that appears within the menu on the right-hand side.
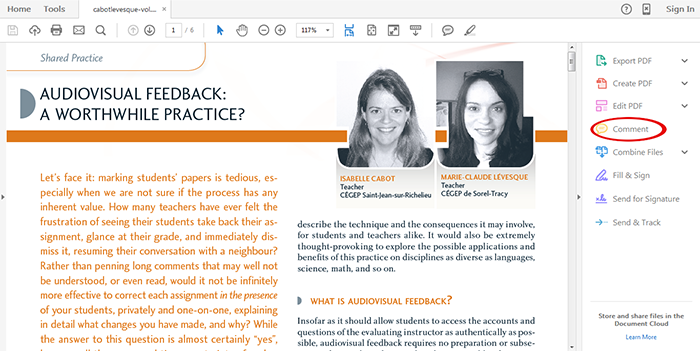
Displaying the “Comment” toolbar in Acrobat Reader DC.
- In the “Comment” toolbar, you can:
- Add notes by clicking on the sticky note tool (looks like a cartoon bubble). You can place notes anywhere in the document (in the image below, I put one above the title of the article. To review and read the text that I type, the readers simply have to hover over the icon or click on it).
- Highlight a text by clicking the marker icon and selecting the text to highlight (you can choose the colour of your highlighter).
- Underline or add a strikethrough to the text. These annotations can be accompanied by comments.
- Suggest insertion of text whether it be two words or two sentences, for example.
- Add text.
- Annotate the text manually by using the mouse or a stylus (if you have a drawing tablet), which is very useful for correcting mistakes in English or French!
- Add stamps (images) that can be customized.
- Add shapes to text boxes.
- Attach entire files to the document by clicking on the paperclip icon.
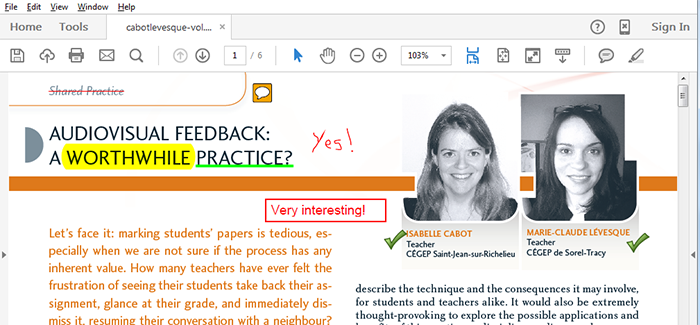
A PDF document that has different types of annotation.
If you have a tablet, there are many more options available for you to annotate PDF files. Among the most popular apps are:
If students have created their work using Microsoft Word, you evidently have the option to export the document to a PDF file. That said, you can also easily use the editing tools that already exist within Word to comment on the document.
In Word, it is possible to insert comments. A tutorial created by Microsoft shows how to do this using Word. What’s more, it’s possible to make modifications within the document while leaving a trace of what changes have been made. A Help page on the Office suite explains how to do this in Word 2013.
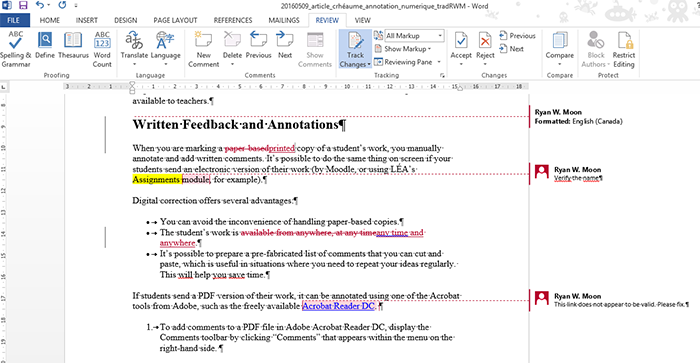
A text is annotated in Word 2013 with the “Comments” and “Track Changes” tools.
In addition, it is possible to do hand-written annotations in Word inside of the document itself or to add comment bubbles with a stylus and graphic tablet if you have one.
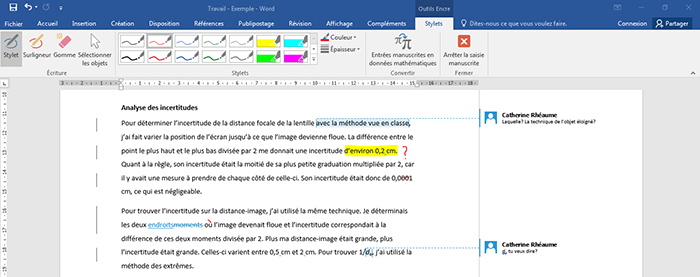
The Draw tab ribbon in Word 2016. To access it, click on “Draw” in the “Review” menu.
Audio Feedback
Recording an audio comment for your students is an interesting option for providing feedback, in particular when you want to:
- Provide detailed explanations to students that would be long to type or write by hand.
- Express emotions more clearly than would be possible in writing.
Would you like to record audio feedback related to your students’ assignments? There are several options available to you.
- In the Adobe Acrobat Reader DC freeware, it is possible to annotate a document by adding audio feedback that is recording directly within the software (view the series of screen captures below).
- As she explains in her Real Life Story Audio Feedback:Customized Feedback for Students, Karine Bélair, a French and Law Teacher, uses Audacity, a very popular free and open source software. You can then upload the audio files that were produced directly to students through Moodle or the “Assignment” module in LÉA.
- On the page Capture Audio Input, the Educapps website presents various mobile applications that may be of interest to you.
- A call for information request sent in 2014 by the Réseau des répondants TIC (REPTIC) presents some suggestions with commentary (in French).
- In Moodle, the PoodLL module allows you to record and automatically transmit audio feedback to students. Even so, if your comments are several minutes in length, the processing of the audio file can take a while. It is better to use this tool for shorter comments. A tutorial on how to use PoodLL is available. There is also a tutorial in French that explains how to use PoodLL to gather audio files from students, but also how to react to them using your voice recording. The procedure is the same when you only want to create feedback).
Many laptops are equipped with integrated microphones. The sound quality isn’t as good as a headset with a microphone, but is still quite acceptable if there is no ambient noise when you are recording.
Add Audio Feedback in Acrobat Reader in Five Clicks
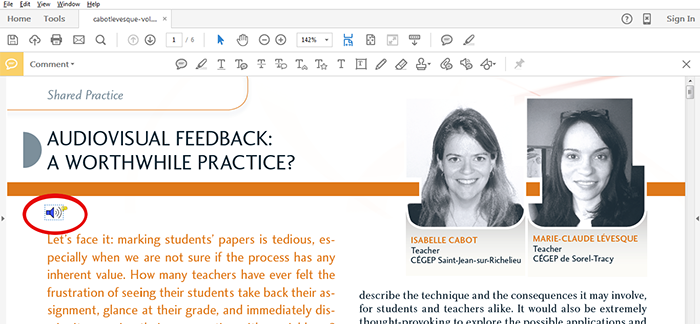
- Start by clicking the icon that is circled in red in the “Comments” bar.
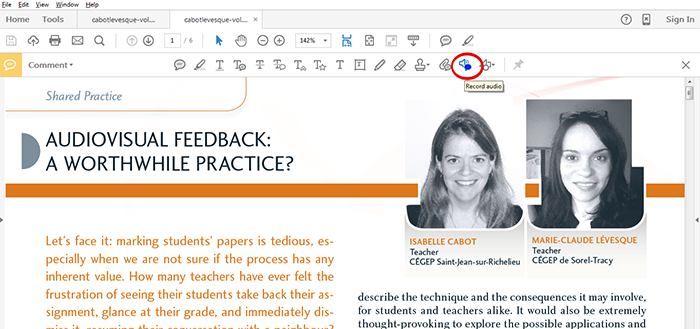
The speaker icon in the “Comment” bar allows you to add audio feedback.
- Click next to the word, sentence or paragraph that you want to comment on. The “Sound Recorder” window will appear. Click on the red circle (Record), then use your microphone to record your comment.
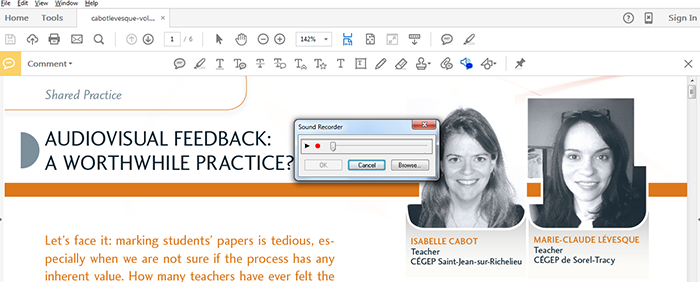
The “Sound Recorder” widget appears in Acrobat Reader DC prior to recording
- When you have finished your comment, click on the black square (Stop).
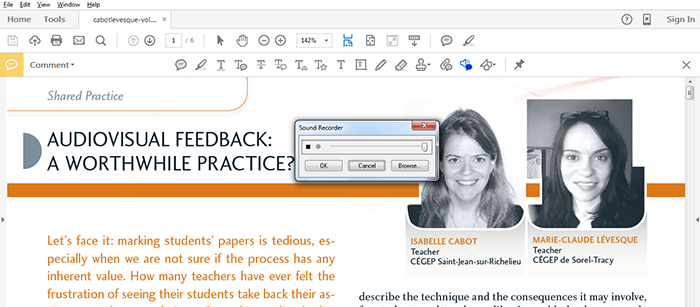
The “Sound Recorder” interface as it appears in Acrobat Reader DC while recording.
- The “Attachment Sound Properties” windows appears. Choose the icon that you want to attribute to your comment (the way i twill be identified within the document) as well as the colour, then click on OK.
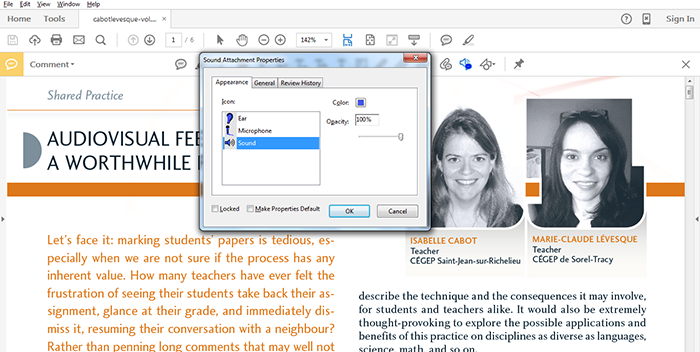
The window that allows you to choose the icon associated with the recorded comment.
- The comment, identified by the icon that you selected will then appear within the document. You can move the icon anywhere in the document. You can listen to the comment by double-clicking the icon. Anyone who views the document will also be able to listen.
The blue speaker icon that was chosen to identify the audio comment now appears in the text.
As you will also see with creating video comments later on, when creating audio comments it is useless to strive for a perfect take (deleting the previous take simply because there was a lengthy pause in order to attain a perfect result). The natural sounding audio doesn’t bother the students – quite the contrary! The process needs to stay simple in order for it to be feasible as part of your teaching approach.
Video Feedback
Various technologies have also made it easy to record video comments intended for your students.
One interesting way to use video is to film yourself in the process of marking the student’s work. You can explain the annotations as you go along and add more thorough explanations without being obliged to write everything down.
If you are correcting a paper, you can set up a camera (or a webcam or smartphone with a camera) on a bracket or tripod, pointing the lens at the paper and the hand you are using to mark up the page.
If you are marking an electronic copy, you may want to use any one of a number of screencasting tools that are available to film what you are doing on-screen (and record your voice) while you are marking.
Some of the more notable free pieces of software include:
- CamStudio, a free and open source software (for Windows) which Profweb has previously featured in a tutorial article
- Webinaria, screencasting software used by Patti Holter from Cégep Lionel-Groulx, which she describes in her Real Life Story on screencasting on Profweb.
- Screenspresso (for Windows)
- Quicktime (for Mac)
Isabelle Cabot, from Cégep de Saint-Jean-sur-Richelieu, and Marie-Claude Lévesque, from Cégep de Sorel-Tracy, wrote a very interesting article on their experience with Audiovisual feedback in the journal Pédagogie collégiale, which was also the subject of a Real Life Story on Profweb. Isabelle and Marie-Claude, who are both French teachers, chose to film their entire marking session for their student essays, which sometimes resulted in videos that exceeded 20 minutes. Other teachers may prefer to mark the assignments without filming themselves, then use screencasting software to provide feedback that requires a brief explanation at the end. In both cases, as with audio feedback, for it to be viable to do this, the videos should be spontaneous and unedited, without worrying about insignificant blunders.
Do any of these approaches interest you? Why not try to combine a few to take advantage of the strengths of each? This is what Catherine Bélec, a teacher at Cégep Gérald-Godin, suggests in her article on multi-type feedback, which appeared in the journal Pédagogie collégiale (abstract in English), and which was featured on Profweb.
